Tutorial: Designing Jobsites
3D Lift Plan Coordinate System
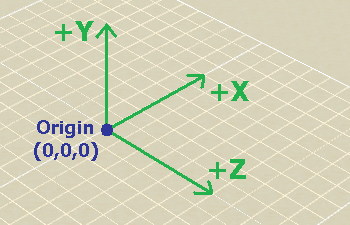
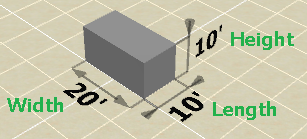
The 3D Lift Plan Coordinate System is oriented as shown in this image.
X and Z values represent a location on the ground.
Y values represent a vertical distance above the ground.
Grid lines are drawn every 10 feet if you are using US units, or every 10 meters if you are using metric units.
Adding an Object to the Jobsite
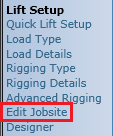
You build and edit your jobsite from the "Edit Jobsite" page, which can be reached by clicking the "Edit Jobsite" link on the left-side
menu.
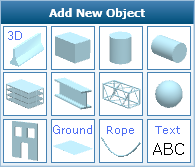
To add a new object to the jobsite, click one of the shapes in the "Add New Object" section.
If this is the first object you are adding to the jobsite, the front edge of the box will be placed at the jobsite origin.
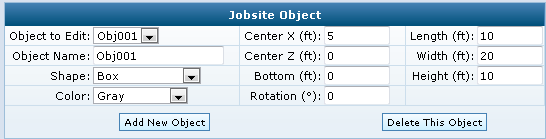
To change the dimensions of the object, edit the Length, Width, and Height values, then press the "Update" button.
The Length of an object always corresponds to it's size in the X-direction. Width always corresponds to the Z-dimension.
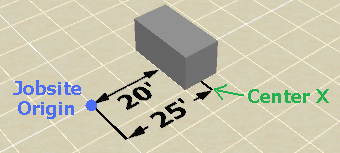
To change the location of the object, edit the "Center X", "Center Z", and "Bottom" values. For instance, to position the default
box so the front edge is 20 feet from the jobsite origin, set "Center X" to 25 ft, accounting for the 10 ft length of the object.
When only one object exists on the jobsite, the program will keep it's front edge at the jobsite origin by default. To move
the object in the x-direction you will need to uncheck the "Keep object edge at origin" checkbox.
Adding a 3D Object to the Jobsite
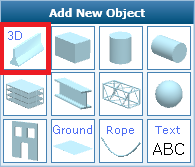
You can choose from the pre-defined objects like Box, Cylinder, and Text, or you can add one of the detailed 3D objects that are included
with 3D Lift Plan. To do so, click the "3D" button in the "Add New Object" box.
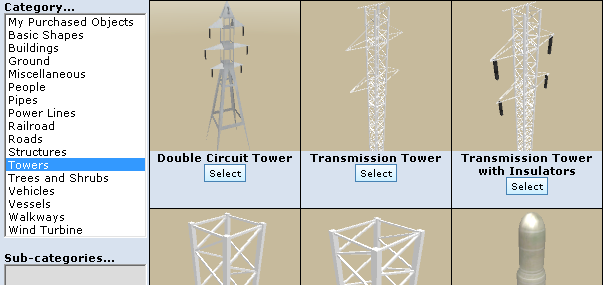
You will be transferred to the 3D Object Selection page. Choose one of the Categories on the left, then select which object you want
to use. Some objects are free to use, but some require purchase.

After selecting a 3D Object, the object will be placed in your jobsite with it's default size. You can modify the size and location
of the object just like you would modify a Box object. The dimensions of 3D Objects correspond to their bounding dimensions, which
are displayed with a semi-transparent bounding box.